As usual I am awake at 4:30 am. Sigh. It doesn’t really matter what time I fall asleep, apparently, this is just my body’s natural rise time. I accept it. So, I watch an episode of I Love Lucy (that show is timeless, and who doesn’t want to wake up with a smile on their face?) then I head downstairs.
It’s a good thing that I get up first, because no one else in the household will make the morning coffee ever since I insisted on grinding my own beans. My mother and father always ground their coffee fresh. (Well, not always, they began doing it when the technology of doing it became popular in home kitchens via small coffee grinders). Of course my mother never did anything cheaply (she did it correctly, and if it was also inexpensive then she was over the moon and would usually brag a little about her bargain.) and if it involved her kitchen, she was going to get the right equipment for the task at hand. So, Braun it was. In fact, my mom bought me my first coffee grinder. It too was a Braun, and that introduced me into that world. I gave it up for a while, not sure exactly why. But now, we’re back on track.
So, back to grinding coffee. Apparently, I am the only one that does not think this is a hard process or a chore, and I definitely think it is worth the time to grind it fresh daily. But, clearly, some people must think it is way too hard. In fact, my husband will go on a coffee strike rather than grind it. I recently learned that when I was out of town a few weeks ago, my son actually ventured to make it for my husband. That’s nice. Enabler.
So, now I am finishing up washing some of the larger pans I left soak over night. It’s still quite dark, and while listening to the morning radio show and making the coffee, I start mentally preparing my day. I know I am down to about 1/4 loaf of bread, so today is the day. Besides, It’s dreary, wet, and an easy work day. So, I have time.
Now, if I am going to make bread, I usually do it in the morning while I am completing my indoor tasks, before heading out to do chores, run errands, or go on appointments. I am a morning person. Rise and shine, and bake bread.

I grew up with my mom baking bread. In fact, Saturday was her bread baking day. She would make bread for the week, freezing several loafs so she never ran out. She also baked rolls, and sometimes treats for our Sunday morning breakfasts, like crescents, or cinnamon rolls. My mother became so proficient in her bread making, it was like second nature. She did it mostly by hand and had this HUGE ceramic bowl (yes, of course I have it) that was specifically used to mix her dough and allow it to rise in. Baking bread was a normal occurrence and a family need. She didn’t make bread as a “special treat” she did it because it tasted better and was better for us than any product she could buy. My mother’s bread recipe was mainly a sandwich style loaf, so it was soft and was the kind of bread that produced crumbs.
So, I have my bread recipe. Mine is more of a rustic Italian, or a baguette style of bread. We don’t eat many sandwiches, so it is more for serving with meals, or I make croutons with it. My son eats it with jelly for breakfast, but it is a different style of bread than my mom’s and only requires one rise. This recipe I can do with my eyes closed, and I usually make one loaf at a time. Sometimes I make two if I plan on giving one to a friend:)
So, it is a super easy bread recipe and I can whip it together super quick, especially with the help of my “Super de Duper Avocado Mixing Miracle”. Well, that is what I am calling it today. This recipe can be made by hand, but it is so much quicker and easier with the mixer. It is also a very forgiving recipe, so if at any time things don’t quite come together as good as it could, it still makes delicious bread. I am not brave enough to say it’s fool proof, because then some fool might prove me wrong, but it is close.


I start by adding a teaspoon of honey to the bottom of the bowl. I just eyeball it. Then I measure and add 2 1/2 teaspoons of yeast to the bowl. Next I measure and add a cup of warm/lukewarm water. The temperature is kind of important because it is what activates the yeast and brings it to life. Too hot or too cold and the yeast won’t activate. If you use your wrist to feel the temperature, you’ll be good. (I don’t know about you, but with years of cooking, my hands can handle molten lava anymore so they are not a good gauge) You can give it a little stir if you want (if the yeast appears to be clumping) but it’s not necessary. Let that sit and bloom for 5 – 10 minutes.
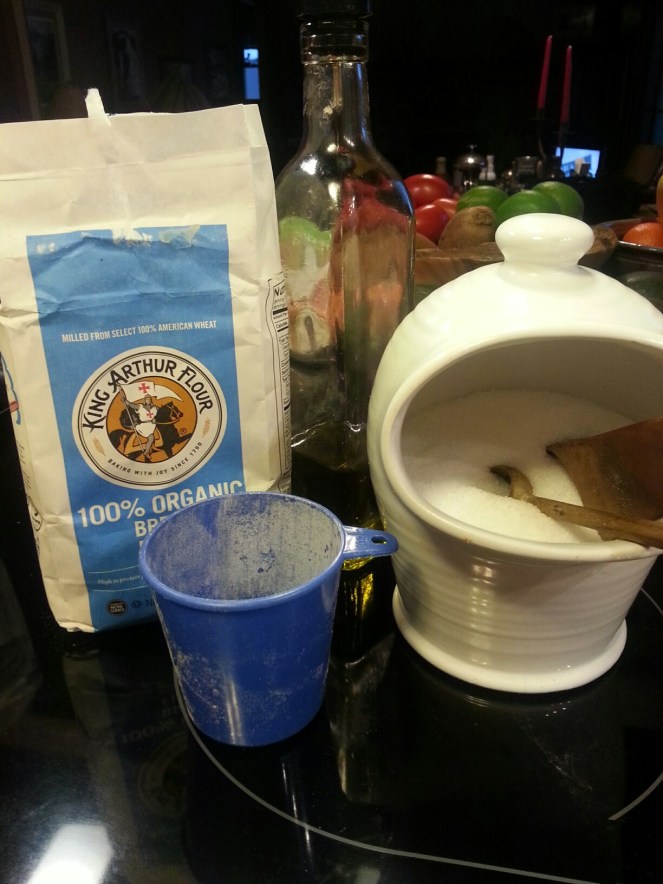


Once the yeast has bloomed and starts to get foamy, then you add 2 cups of flour, 1 teaspoon of salt (I use sea salt) and 2 tablespoons of olive oil. I eyeball the olive oil. Then I mix it on low speed, while I use my spatula to coax the ingredients off the sides and into the dough hook. It’s going to be a wet, sticky, mess right now.


I stop the mixer, then I measure a cup of flour and I add about 3/4 of it to the bowl and start the mixer again. I continue to use the spatula to scrape the dough off the sides and up off the bottom and into the dough hook to blend the remaining flour in with the wet dough. Once the dough forms, and starts to stick together without sticking to the sides, I am ready to knead. If the dough remains too wet (a real sticky, gloopy, mess) add the remaining flour a little at a time until you get the consistency you want. Be patient, it will be sticky at first and then almost like magic, it comes together. So now, I get my spatula the heck out of the way and turn the mixer to medium (3-4 speed) and let it do the kneading for me. It will stick to the dough hook and then fall and slap against the sides, and the dough will start to look smooth and stretchy. It usually only takes a minute or two. I never over work it (that can cause the dough to not rise properly). Then I lift the attachment out of the bowl and while the dough hangs in “limbo” I drizzle some additional olive oil in the bottom and slightly up the sides of the bowl. Probably a couple of teaspoons or so, you don’t need much. It is only so the dough will not stick to the bowl while rising. Then I pull the dough off the hook and let it fall into the oil. I take the dough and form a ball and kind of turn and roll it to get the dough and the sides of the bowl covered with a thin layer of the oil. Now simply cover (I use a clean dish towel, just like my mom did), and let stand in a warm, dark, place, and let that yeast enjoy the fruits of your labor. it will double in size in about an hour. So, as my mom would say “Go do something”. After about 30 minutes I turn on the oven, but you can turn it on at any stage prior to this. I set it at 425 degrees. I have my baking rack set in the top half (NOT top position) of the oven with my pizza stone (don’t have to have one) and my boiler pan (now designated bread, water, pan) on the lower rack. Anywhere below the bread.


So, after about an hour, the dough is doubled. Give it a punch right in the middle. Go ahead put someone’s face there if needed. The dough will deflate. Now put the towel back on and let it sit for an additional ten minutes.


While the dough is having it’s 10 minute nap, I get my baking sheet and gently warm it in the oven. Just a minute or so, not too hot, just to take the chill off, and I place a piece of parchment paper on the baking sheet. I pull out my kitchen shears, and I’m ready to go.


After ten minutes, it’s time to get that lazy dough out of it’s cozy bed and onto the parchment. Just use a spatula and gently scrape away as it slowly pours out, in one piece, onto the paper. Then form it into a loaf. Whatever shape and size you want. You can do round, long and thin, or kind of Italian style like I have. Because the bread will expand when you bake it, generally you put some sort of opening (a slit) to encourage it to spread there and not burst and break open where it wants to, although, it sometimes happens. If so, no harm done. It doesn’t change the taste one bit. The easiest way I found to do this task, is to take my kitchen shears and simply make cuts in my dough, but, you can use a sharp knife or even a razor blade to make your slits. Next, I slide the parchment and bread directly onto my stone. If your not using one, then place the baking sheet with the parchment and bread into the oven above the broiler pan. Do this kind of quickly as to not lose too much heat. Then I let it go for a minute to get the oven good and hot again. While I do that, I run the tap water to get it nice and hot. Then I take the measuring cup and fill it with hot water, I open the oven door, and as quickly as possible I dump the water in the broiler pan and close the door. (you won’t use the full cup of water, but the fuller the cup, the less time it takes to get a decent amount into the broiler pan). This will create steam in the oven and help build a really crispy crust. Again, I let it go for just a short time afterwards to get that oven back up to temperature, and then I turn the oven down to 400 degrees for the remainder of the baking time. I will give it another dose of water as soon as I hear my pan pop. It tells me when it is empty. I love when the cookware helps. When the bread is nicely brown, I slip the parchment out from underneath the bread and let the stone kind of crisp up the bottom crust. It’s not necessary and again, you can do this with the baking sheet too. I found that the parchment can sometimes keep that bottom crust a little soft, and I love crusty, hearty, rustic, style bread. After about 30 minutes or so, your bread should be pretty brown and ready to come out. I slip it onto my cooling rack and put up my “Kitchen Closed” sign, because, if I don’t, my kitchen will get visitors, the kind that like to cut into warm bread and smear it with butter. Everyone knows that the baker gets the first piece 🙂


And there you have it.
In writing this post, it seemed kind of long and sounded hard, but once you do it, it is really quite easy, and you learn the timing, and realize you have more time than you think to get this bread made. You might need to be “around” for nearly 2 hours, but that is still 2 hours that you can be productive. Most of the time spent in this process, the bread is either rising or baking. The mixing and the shaping takes mere minutes. There is something very ritualistic about baking bread. It is definitely a process that soothes my soul, and every time I make it I am grateful that my mother taught me this process, and every time I make bread, in my mind I say “If you can bake bread, you will never go hungry”. 🙂

Recipe Recap:
1 tsp honey, agave, or sugar
2 1/2 tsp of active dry yeast
1 cup of water
* Put the above ingredients in a bowl and let sit for 5 – 10 minutes
3 cups of flour
1 tsp of salt
2 TB of olive oil plus 2 tsp for coating bowl
* To the bowl, add 2 cups of flour, the salt, and the 2 TB of oil. Mix by hand or mixer until incorporated. Add the remaining flour as needed until the dough is workable. Knead by hand or machine until the dough is smooth and stretchy. Form dough into a ball. Coat the bowl and the dough with the 2 tsp of oil, cover, and let rise for an hour. After 30 minutes turn the oven on at 425 degrees with an oven proof pan set in the bottom half of the oven. (Due to the temperature, a broiler pan works perfect).
After an hour punch down the dough, and let sit for an additional ten minutes. Turn dough out onto a sheet of parchment paper on top of your baking sheet. The paper should be big enough to hold the loaf of bread. Shape the dough into a loaf, put three slits in the top, and place in the top half of oven (NOT top position).
Fill a measuring cup with hot tap water. Open the oven door and dump the water into the broiler pan located below the bread, and quickly close the door. Turn oven down to 400 degrees, and bake until the bread is a nice medium golden brown, about 20 – 30 minutes or so. (ovens vary). Remove from oven and let cool, on a rack.
*Note – If you do not have a good pan to use for the water, you can simply use a spray bottle filled with water, and spray the water into the oven several times during the baking process.
Enjoy!

I’m in a bread making mood and this recipe is just what I was looking for.
LikeLike